Tag: lab equipment

Battery-powered, Pocket-sized PCR Thermocycler

Posted by – November 1, 2009

A few years ago, some bright students at Texas A&M improved upon the most basic tool for manipulating microbiology: a thermocycler.   Thermocyclers are typically large tabletop instruments which require a large sample, a lot of electrical power, and a lot of time to heat and cool.  Alternatively, the process can be done by hand with a pot of boiling water, a bucket of cold water, a stopwatch, and a lot of free time and patience.   The sample itself, for the purpose of “amplifying” the desired material in the sample, runs through many iterations of heat/cool cycling, such as the following:

  • Denature: 95°C, 15 mins

Thermocycling

  • No. of cycles: 39
  • Denature: 94°C, 30 secs
  • Anneal: 62°C, 30 secs
  • Elongate: 68°C, 3.5 mins

Termination

  • Elongate: 68°C, 20 mins
  • Hold: 4°C, until removed from machine

The Texas team created a pocket-sized version, which could run on batteries as well, and most notably, was able to create a new patent.  By creating a pocket-sized, battery powered device, the team accomplished several very important features:

  • The device can be used easily at the point-of-care, as a field unit;
  • The device is much lower engineering cost, and much lower patent royalty cost: from thousands of dollars down to hundreds of dollars;
  • The device uses a much smaller sample, and has faster heat/cool times, thus reducing the experimental cost and experimental time.

This new thermocycler has created some excitement in the bio community for some time — however, it still took over a year to finish patent issues.  The university owned the patent; they requested royalties, and up-front option fees, and meanwhile, the device itself remained in limbo.  The great news is that the manufacturing prototype is announced (see below).  The bad news is that such patent hassles are typical, and this was a simple case where a university owned the patent in whole rather than multiple holders owning the patent in part.

From the business angle, the thermocycler market is a billion-dollar market, since it is a fundamental tool for all microbiology or genetic engineering labs.

Some of original papers and articles for the “$5 thermocycler” are:

From Rob Carlson’s synthesis.cc blog:

This week Biodesic shipped an engineering prototype of the LavaAmp PCR thermocycler to Gahaga Biosciences.  Joseph Jackson and Guido Nunez-Mujica will be showing it off on a road trip through California this week, starting this weekend at BilPil.  The intended initial customers are hobbyists and schools.  The price point for new LavaAmps should be well underneath the several thousand dollars charged for educational thermocyclers that use heater blocks powered by peltier chips.

The LavaAmp is based on the convective PCR thermocycler demonstrated by Agrawal et al, which has been licensed from Texas A&M University to Gahaga.  Under contract from Gahaga, Biodesic reduced the material costs and power consumption of the device.  We started by switching from the aluminum block heaters in the original device (expensive) to thin film heaters printed on plastic.  A photo of the engineering prototype is below (inset shows a cell phone for scale).  PCR reagents, as in the original demonstration, are contained in a PFTE loop slid over the heater core.  Only one loop is shown for demonstration purposes, though clearly the capacity is much larger.

lavaamp.png

The existing prototype has three independently controllable heating zones that can reach 100C.  The device can be powered either by a USB connection or an AC adapter (or batteries, if desired).  The USB connection is primarily used for power, but is also used to program the temperature setpoints for each zone.  The design is intended to accommodate additional measurement capability such as real-time fluorescence monitoring.

We searched hard for the right materials to form the heaters and thin film conductive inks are a definite win.  They heat very quickly and have almost zero thermal mass.  The prototype, for example, uses approximately 2W whereas the battery-operated device in the original publication used around 6W.

What we have produced is an engineering prototype to demonstrate materials and controls — the form factor will certainly be different in production.  It may look something like a soda can, though I think we could probably fit the whole thing inside a 100ml centrifuge tube.

If I get my hands on one myself, I’ll post a review.

Add Streaming Video to any Bio-lab!

Posted by – October 16, 2009

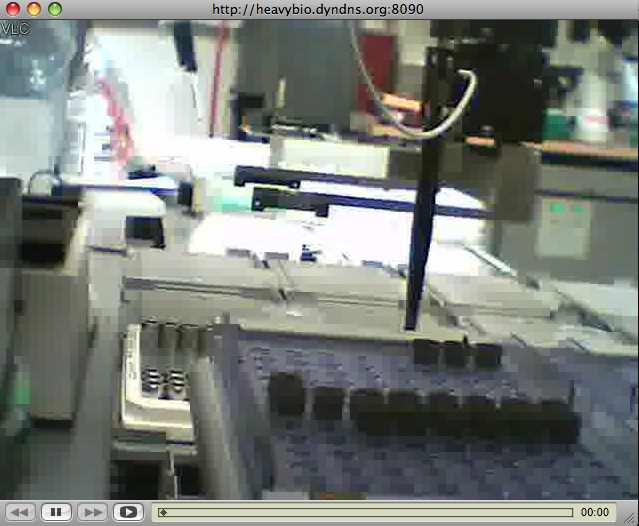
Combining an inexpensive (under $15) USB webcam with free VLC media player software, it is simple to add password-protected internet streaming video for remote users to any lab.  VLC includes the ability to capture from a local webcam, transcode the video data, and stream the video over the web.  It’s available for OS/X, Unix, Linux, and Microsoft systems.

Hint: Video formats are confusing.  Even video professionals have a tricky time figuring out the standards and compatibility issues.  Today’s web browsers also have limitations in what they can display (mime types and such) — which simply means both sides need to use VLC.  Figuring all this out using the VLC documentation takes some work.  Transcoding the video is required and a proper container must be used to encapsulate both video and audio.  Once debugged, it’s good to go.

Here’s how it worked in the lab:

Webcam for Biotech Lab Automation

See the setup below to get it running.

More

More on Bio-lab Automation – Software for Controlling FIAlab Devices for Microfluidics

Posted by – October 9, 2009

Perl software to control lab syringe pump and valve device, for biology automation, initial version finished today. Works great.  Next, need to add the network code, it can be controlled remotely and in synchronization with other laboratory devices, including the bio-robot.  This software will be used in the microfluidics project.  The software is also part of the larger Perl Robotics project, and a new release will be posted to CPAN next week.
FIAlab MicroSIA Valve and Syringe System FIAlab MicroSIA Experimental Setup

More details on the software follow:

More

Perl Bio-Robotics module, Robotics.pm and Robotics::Tecan

Posted by – July 30, 2009

FYI for Bioperl developers:

I am developing a module for communication with biology robotics, as discussed recently on #bioperl, and I invite your comments. Currently this module talks to a Tecan genesis workstation robot. Other vendors are Beckman Biomek, Agilent, etc. No such modules exist anywhere on the ‘net with the exception of some visual basic and labview scripts which I have found. There are some computational biologists who program for robots via high level s/w, but these scripts are not distributed as OSS.

With Tecan, there is a datapipe interface for hardware communication, as an added $$ option from the vendor. I haven’t checked other vendors to see if they likewise have an open communication path for third party software. By allowing third-party communication, then naturally the next step is to create a socket client-server; especially as the robot vendor only support MS Win and using the local machine has typical Microsoft issues (like losing real time communication with the hardware due to GUI animation, bad operating system stability, no unix except cygwin, etc).

On Namespace:

I have chosen Robotics and Robotics::Tecan. (After discussion regarding the potential name of Bio::Robotics.)  There are many s/w modules already called ‘robots’ (web spider robots, chat bots, www automate, etc) so I chose the longer name “robotics” to differentiate this module as manipulating real hardware. Robotics is the abstraction for generic robotics and Robotics::(vendor) is the manufacturer-specific implementation. Robot control is made more complex due to the very configurable nature of the work table (placement of equipment, type of equipment, type of attached arm, etc). The abstraction has to be careful not to generalize or assume too much. In some cases, the Robotics modules may expand to arbitrary equipment such as thermocyclers, tray holders, imagers, etc – that could be a future roadmap plan.

Here is some theoretical example usage below, subject to change. At this time I am deciding how much state to keep within the Perl module. By keeping state, some robot programming might be simplified (avoiding deadlock or tracking tips). In general I am aiming for a more “protocol friendly” method implementation.

To use this software with locally-connected robotics hardware:

    use Robotics;
    use Robotics::Tecan;

    my %hardware = Robotics::query();
    if ($hardware{"Tecan-Genesis"} eq "ok") {
    	print "Found locally-connected Tecan Genesis robotics!\n";
    }
    elsif ($hardware{"Tecan-Genesis"} eq "busy") {
    	print "Found locally-connected Tecan Genesis robotics but it is busy moving!\n";
    	exit -2;
    }
    else {
    	print "No robotics hardware connected\n";
    	exit -3;
    }
    my $tecan = Robotics->new("Tecan") || die;
    $tecan->attach() || die;    # initiate communications
    $tecan->home("roma0");      # move robotics arm
    $tecan->move("roma0", "platestack", "e");    # move robotics arm to vector's end
    # TBD $tecan->fetch_tips($tip, $tip_rack);   # move liquid handling arm to get tips
    # TBD $tecan->liquid_move($aspiratevol, $dispensevol, $from, $to);
    ...

To use this software with remote robotics hardware over the network:

  # On the local machine, run:
    use Robotics;
    use Robotics::Tecan;

    my @connected_hardware = Robotics->query();
    my $tecan = Robotics->new("Tecan") || die "no tecan found in @connected_hardware\n";
    $tecan->attach() || die;
    # TBD $tecan->configure("my work table configuration file") || die;
    # Run the server and process commands
    while (1) {
      $error = $tecan->server(passwordplaintext => "0xd290"); # start the server
      # Internally runs communications between client->server->robotics
      if ($tecan->lastClientCommand() =~ /^shutdown/) {
        last;

    }
    $tecan->detach();   # stop server, end robotics communciations
    exit(0);

  # On the remote machine (the client), run:
    use Robotics;
    use Robotics::Tecan;

    my $server = "heavybio.dyndns.org:8080";
    my $password = "0xd290";
    my $tecan = Robotics->new("Tecan");
    $tecan->connect($server, $mypassword) || die;
    $tecan->home();

    ... same as first example with communication automatically routing over network ...
    $tecan->detach();   # end communications
    exit(0);

Some notes for those who may also want to create Perl modules for general or BioPerl use:

  • Use search.cpan.org to get Module-Starter
  • Run Module-Starter to create new module from module template
  • Read Module::Build::Authoring
  • Read Bioperl guide for authoring new modules
  • Copy/write perl code into the new module
  • Add POD, perl documentation
  • Add unit tests into the new module
  • Register for CPAN account (see CPAN wiki), register namespace
  • Verify all files are in standard CPAN directory structure
  • Commit & Release

“Centrifuge the column(s) at ≥10,000×g (13,000 rpm) for 1 minute, then discard the flow-through.”

Posted by – July 30, 2009

A basic equation of physics, for those out there building their own centrifuges:

What are RPM, RCF, and g force and how do I convert between them?

The magnitude of the radial force generated in a centrifuge is expressed relative to the earth’s gravitational force (g force) and known as the RCF (relative centrifugal field).  RCF values are denoted by a numerical number in “g” (ex. 1,000 x g).  It is dependent on the speed of the rotor in revolutions per minute (RPM) and the radius of rotation.  Most centrifuges are set to display RPM but have the option to change the readout to RCF.

To convert between the two by hand, use the following equation:

RCF  =  11.18 (rcm) (rpm/1000)^2

Where rcm = the radius of the rotor in centimeters.

HVPS for Systems Biology: A Low Cost, High Voltage Power Supply with Schematics + Board Layout

Posted by – June 22, 2009

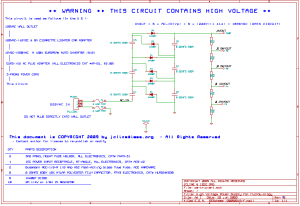
I have designed this high voltage, low current power supply for various experiments in systems & synthetic biology. I have cleaned up the design and I am placing the schematic and board layout online below!  This circuit outputs up to +1,866VDC at under 1 mA or can be tapped at various points for +622VDC or +933VDC. This is useful for either DIY Biology or institutional research experiments such as:

  • capillary electrophoresis
  • digital microfluidics using electrowetting-on-dielectric
  • possibly electroporation
  • various electrokinetic experiments, such as dielectrophoresis
  • (other uses?? Let me know)
  • and, lastly of course:  making huge sparks that go PAHHHHH-POP

Below is the schematic; read the full post below for the board layout information.  Click on the schematic for the full sized version.  The schematic operates in stages, so leaving out or bypassing before the 2nd final stage will yield only +933VDC, and leaving out that stage will yield only +622VDC, etc.

Schematic for the HVPS "Tripler1"

Schematic for the HVPS

More

Build a Spectrophotometer (Schematics included) as a DIY Project

Posted by – December 26, 2008

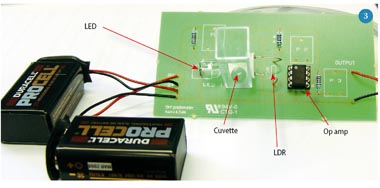
I recently ran across this published paper.  Most skunkwork types seem to buy used equipment via ebay.    This article explains how to build a spectrophotometer with schematics, illustrations, and photos.  The circuit is simple:  a photoresistor, op amp, and some mechanics for the optics.

The article even includes a Bill of Materials  (component price list); for the electronics, anyway, and it’s cheap (less than $20 for single quantities through Digikey).  The article is geared towards having undergraduate students build their own laboratory equipment as an educational exercise — and if undergrads can do it, anyone can do it (the article says that a science camp of kids aged 13 to 16 found success).

Education in Chemistry

Build your own spectrophotometer

Summary

  • Take a 100 W light bulb, a light-dependent resistor and op amp, a prism or grating in front of a slit, and a curtain – and voilà , a DIY spectrophotometer.
If you build this project or a similar one, leave a comment below.